Wednesday, December 21, 2011

'Tis the season for sharing (via your Android code)


Come Facebook, come Twitter, come Tumblr and Flickr!

No app is an island, we often want to be able to share the cool things we create with our apps with the world, whether it's the latest social network to on-sell our personal details, or just plain old email to your gran.


.. And here's how.

Lets say we have an image file located here:
String fileLocation = "/mnt/sdcard/SomeMediaFiles/aMediaFile10.jpg"

We can share this easily by passing the reference to our file location into the below method:
 
    public void shareFile(String newFilePath) {
      {Intent share = new Intent(Intent.ACTION_SEND);
      share.setType("image/jpeg"); 
 
//declare the MIME type of the file. .. What you pass into share.setType determines what apps appears in your Sharing list.

      Uri imageUri = Uri.fromFile(new File(newImagePath));
      share.putExtra(Intent.EXTRA_STREAM, imageUri);
   
      startActivity(Intent.createChooser(share, "Share"));
 }
}
And this is basically what is the result (actual apps listed will depend on what is installed on your users device):


... Easy.


Saturday, December 10, 2011

OutOfMemory errors when populating a Gallery


I've just spent the last couple of hours wrestling with OutOfMemory errors when populating a Gallery widget with photos, and as fun as it's been, I think I've sorted it out and thought I'd share my solution with you.

For starters, the reason we're getting OutOfMemory errors in the first place is that the heap size on Android devices is limited to something like 16 MB on a G1 and 24 MB on a Nexus one.

As soon as you start to work with media files you quickly start to learn that you need to work to manage your memory usage with Android as a result of this limitation.

I would also like to thank direct to device debugging, I couldn't have done this without utilizing it, I would go as far as saying that it is essential in situations like this.

Here is the full code of one of my imageAdapters,  I'm using this to provide the images to my Gallery widget like this:

galleryTop.setAdapter(new ImageAdapterTop(this));


The Adapter class :

public class ImageAdapterTop extends BaseAdapter {
   int mGalleryItemBackground;
   private Context mContext;


    File[] allTopSlices = Utils.getAllTopSlices();  
    String[] fullPathAllTopSlices = new String[allTopSlices.length];
    Uri[] uriAllTopSlices = new Uri[fullPathAllTopSlices.length];


   public ImageAdapterTop(Context c) {
       mContext = c;
       TypedArray a = obtainStyledAttributes(R.styleable.HelloGallery);
       mGalleryItemBackground = a.getResourceId(
               R.styleable.HelloGallery_android_galleryItemBackground, 0);
       a.recycle();
   }


   public int getCount() {
       return uriAllTopSlices.length;
   }


   public Object getItem(int position) {
       return position;
   }


   public long getItemId(int position) {
       return position;
   }


   public View getView(int position, View convertView, ViewGroup parent) {
    int screenHeightPx = Utils.GetScreenHeight(getWindowManager().getDefaultDisplay());
   
    for(int i = 0; i < allTopSlices.length; i++){
    fullPathAllTopSlices[i] = allTopSlices[i].getAbsolutePath();
    }
   
    for(int j=0; j < fullPathAllTopSlices.length; j++){
    uriAllTopSlices[j] = Uri.parse(fullPathAllTopSlices[j]);
    }
   
       ImageView i = new ImageView(mContext);
     
       recycleDrawable(i);


       i.setImageBitmap(Utils.readBitmap(uriAllTopSlices[position].toString()));
     
       i.setLayoutParams(new Gallery.LayoutParams(400, (screenHeightPx-50) /3));
       i.setScaleType(ImageView.ScaleType.FIT_XY);      
       i.setBackgroundResource(mGalleryItemBackground);


       System.gc();
       return i;
     
   }
}


and the referenced recycleDrawable :

private void recycleDrawable(ImageView i) {
BitmapDrawable currentBitmapDrawable = (BitmapDrawable)i.getDrawable();

if(currentBitmapDrawable != null){
currentBitmapDrawable.getBitmap().recycle();        
}
        System.gc();
}


and readBitmap methods:

public static Bitmap readBitmap(String selectedImage) {
Bitmap bm = null;
BitmapFactory.Options options = new BitmapFactory.Options();
options.inSampleSize = 8;


try {
bm = BitmapFactory.decodeFile(selectedImage, options);
}
catch (OutOfMemoryError e) {
e.printStackTrace();
}

return bm;
}

Probably worth mentioning that the 'options.inSampleSize' reference, which is downsizing the image is pretty much essential when working with large files with the memory constraints associated with current Android devices.

Hope that helps someone out there.


Sunday, November 20, 2011

'An error has occurred' when working with Bitmaps


On a recent project I needed to rotate and slice images taken from the camera, and I found that I was getting regular, but annoying to track down 'an error has occurred' messages.

I couldn't see anything in particular that was wrong with my code, and what made it worse was that I wasn't receiving any errors at all in the emulator, only when I deployed the app to my phone for testing.

It took a few hours to figure out what was going on, so I thought I'd share it here and maybe save somebody else some time.

Like a lot of errors, it seemed painfully obvious after the fact, but the cause was I was basically running out of memory when creating the bitmap objects below. From my experience, you can only create one or two bitmap objects before you will encounter issues like this, because the heap size on Android devices is limited to something like 16 MB on a G1 and 24 MB on a Nexus one.
.. That's not a lot of 6 MB photos.

Luckily, it's super easy to fix.
All you need to do is recycle the bitmaps once you've finished with them, as per below code, and as pointed out by Romain Guy here,

"..The problem is that it can take a couple of GC cycles for a Bitmap to be properly released on Android before Android 3.x. Even if you call recycle() I believe the bitmap counts against your heap usage until at least the next GC. This is one of the very few situations where I would advise you to force a GC by calling System.gc()."

Matrix mat = new Matrix();
mat.postRotate(90);

Bitmap photoRotated = Bitmap.createBitmap(bitmapToSave, 0, 0, bitmapToSave.getWidth(), bitmapToSave.getHeight(), mat, false);

Bitmap photoCut1 = Bitmap.createBitmap(photoRotated, 0, 0, photoRotated.getWidth(), heightOfSlice);

photoRotated.recycle();

//save photoCut1 bitmap here

photoCut1.recycle();
System.gc();


So don't forget to recycle and call System.gc() a couple of times when working with large files like images and hopefully, like me, your errors messages will disappear.

Monday, June 13, 2011

How to get the size and orientation of your device screen


Found this great snippet over at http://www.androidsnippets.com/ that allows you to find the size and orientation of the device screen at runtime, and thought I'd share it:

/* First, get the Display from the WindowManager */
Display display = ((WindowManager) getSystemService(WINDOW_SERVICE)).getDefaultDisplay();

/* Now we can retrieve all display-related infos */
int width = display.getWidth();
int height = display.getHeight();
int orientation = display.getOrientation();
// see http://androidsnippets.com/get-size-and-orientation-of-the-screen

Saturday, May 28, 2011

How do you make money with your Android app?

Free?
Obviously not the best way to make money, but a good way to get your name out there, and earn some good karma points while you're at it.

Advantages: maximum exposure to users, everyone who might possible have a use for it considers a free app and will probably install your app even temporarily. You get an opportunity to impress them and build a trusted name with them. The Android Market also lists other apps by the same developer, so viewers of your free apps on the market will be exposed to anything else you publish, driving traffic towards any other apps you might have.

Disadvantages: Without charging for the app itself, you have to use advertising or in-app purchases or other tie-ins in order to make money (see next).


Free with Ads?

Advantages: Ad providers such as admob support house ads, which is advertising for your own products. This opens another opportunity to use your free apps to drive traffic towards any paid apps you might have, or other free offerings too.

Disadvantages:

Advertising sdk's usually add an additional weight to your app size, and there's the obvious loss of screen real-estate also. Additionally, people have to actually use your app in order to see and hopefully click on the ads, so unless your app involves a decent amount of user interaction this might not be for you. To make the most of advertising you want to have an app that keeps users coming back to the screen. Something like a countdown timer for instance might not be so suitable for an advertising-based revenue model as the concept involves minimum user face time, users typically set the timer and turn off the screen.

Advertising platforms:


Free with in-app purchases?
Advantages: You get users in the door and using your app, now you can ply them with the ability to purchase additional related goods in-app. Micro-payment systems mean that your users have the option of adding custom content for mere cents, all within the bounds of your free app, and an app that might not generate much interest even at the lowest price point (usually 99c), is able to still generate income. You get the user mass by distributing your core app for free, and then can utilise novelty-driven or premium-functionality requirements towards generating income. Can also be combined with Advertising, but be mindful of how this can adversely affect user perception of your app.

Disadvantages: more complex to implement that advertising, and obviously requires actual additional content which not all apps are suited to. Micropayment systems not available in all countries.

In-app billing/virtual goods/virtual currencies:

Free cut-down or trial version and paid 'pro' version?
Advantages: Similar to in-app purchases and other 'freemium' techniques, you introduce the users to the concept of your app in the free version, then hope that some of these users are willing to pay for additional content once your free version has earned their respect.

Disadvantages: Unlike in-app purchases and the micro-payment model, the paid 'pro' version is restricted by the minimum price point of the market through which you're distributing your app which in the case of the Android Market is 99c. If you don't have the additional content to warrant meeting that initial price threshold, you're flat out of luck.


Paid?

Advantages: You make profit upfront, regardless of how much someone uses your app, and regardless of even if they keep it installed. Once they've past that initial 15 minutes to refund, you profit.

Disadvantages: Android users are a notoriously stingy bunch, although as more Android users could be considered the mainstream demographic rather than the tech-head early adopters, this may change. Piracy can also be an issue, so make use of the licensing validation library provided by Google. Paid apps also run the risk of being undersold by a competing free product that relies on one of the other methods above to generate income. Also, as strange as it might seem, many users balk when confronted with the option of paying 99c for an app for their $500 device.


Wednesday, March 23, 2011

Creating a simple border with rounded corners for a layout or view

not the border in question..


Hi all, just thought I'd post this simple snippet that I've just found.
This allows you to simply add a border ( even with rounded corners!) to a layout or view.

All you need to do is create a new xml file somewhere in /res/drawable called 'the_border.xml'
with this or similar as the contents:

<shape xmlns:android="http://schemas.android.com/apk/res/android"> 
    <stroke android:width="1dp" android:color="#FFFFFF" /> 
    <padding android:left="7dp" android:top="13dp" 
            android:right="7dp" android:bottom="17dp" /> 
    <corners android:radius="4dp" /> 
</shape> 

You can then reference this as the background of an item in your layout like this (in xml)

android:background="@drawable/the_border"

or like this in code:

llErrorMessage.setBackgroundResource(R.drawable.the_border);

Nice eh?

Wednesday, March 16, 2011

My new Android app, 'Herbert the Herb & Spice Helper' now available on the Android Market


My new Android app, 'Herbert the Herb & Spice Helper' is now available on the Android Market.


Here's the blurb: "With over 70 herbs and spices, 50+ ingredients and 19 different meal styles, you'll never be lost in your kitchen again.
Herbert the Herb & Spice Helper allows you to mix and match ingredients and meal styles to see what combinations are best.
Each herb and spice comes with a list of compatible herb and spices, and also what you can use instead, so you don't have to run to the supermarket at the last moment."


Oh what? You want screenshots?
Ok, here you go:


A veritable bargain at only 99c AU
Get it here.

Wednesday, February 23, 2011

Android 3.0 ‘Honeycomb’ SDK now available


Google’s Android developer team has announced the first Android 3.0 (API Level: 11) software developer kit is available to developers to create apps and widgets for tablet devices.

Android 3.0 is a new version of the Android platform that is specifically optimised for devices with larger screen sizes, particularly tablets. It introduces a brand new 'holographic' UI design, as well as an elegant, content-focused interaction model.


New features include:

· UI Builder improvements in the ADT Plugin, including a new Palette tool with categories and rendering previews, more accurate rendering of layouts to more faithfully reflect how the layout will look on devices, including rendering status and title bars to more accurately reflect screen space actually available to applications.

Selection-sensitive action bars to manipulate View properties.

Zoom improvements (fit to view, persistent scale, keyboard access)

Improved support for layouts, as well as layouts with gesture overlays.

Traceview integration for easier profiling from ADT.

Tools for using the Renderscript graphics engine: the SDK tools now compiles .rs files into Java Programming Language files and native bytecode.


Fragments

A fragment is a new framework component that allows you to separate distinct elements of an activity into self-contained modules that define their own UI and lifecycle. To create a fragment, you must extend the Fragment class and implement several lifecycle callback methods, similar to an Activity. You can then combine multiple fragments in a single activity to build a multi-pane UI in which each pane manages its own lifecycle and user inputs.

You can also use a fragment without providing a UI and instead use the fragment as a worker for the activity, such as to manage the progress of a download that occurs only while the activity is running.

Fragments are self-contained and you can reuse them in multiple activities.

You can add, remove, replace and animate fragments inside the activity
You can add fragments to a back stack managed by the activity, preserving the state of fragments as they are changed and allowing the user to navigate backward through the different states
By providing alternative layouts, you can mix and match fragments, based on the screen size and orientation
Fragments have direct access to their container activity and can contribute items to the activity's Action Bar.


New animation framework

The platform includes a flexible new animation framework that lets developers easily animate the properties of UI elements such as Views, Widgets, Fragments, Drawables, or any arbitrary object. Animations can create fades or movement between states, loop an animated image or an existing animation, change colors, and much more. Adding animation to UI elements can add visual interest to an application and refine the user experience, to keep users engaged.


Hardware-accelerated 2D graphics

Android 3.0 offers a new hardware-accelerated OpenGL renderer that gives a performance boost to many common graphics operations for applications running in the Android framework. When the renderer is enabled, most operations in Canvas, Paint, Xfermode, ColorFilter, Shader, and Camera are accelerated. Developers can control how hardware-acceleration is applied at every level, from enabling it globally in an application to enabling it in specific Activities and Views inside the application.


Renderscript 3D graphics engine

Renderscript is a runtime 3D framework that provides both an API for building 3D scenes as well as a special, platform-independent shader language for maximum performance. Using Renderscript, you can accelerate graphics operations and data processing. Renderscript is an ideal way to create high-performance 3D effects for applications, wallpapers, carousels, and more.


Support for multicore processor architectures

Android 3.0 is the first version of the platform designed to run on either single or multicore processor architectures. A variety of changes in the Dalvik VM, Bionic library, and elsewhere add support for symmetric multiprocessing in multicore environments. These optimizations can benefit all applications, even those that are single-threaded. For example, with two active cores, a single-threaded application might still see a performance boost if the Dalvik garbage collector runs on the second core. The system will arrange for this automatically.


System clipboard

Applications can now copy and paste data (beyond mere text) to and from the system-wide clipboard. Clipped data can be plain text, a URI, or an intent.

By providing the system access to the data you want the user to copy, through a content provider, the user can copy complex content (such as an image or data structure) from your application and paste it into another application that supports that type of content.

.. and more!

Sunday, February 13, 2011

TextView background is black when setting colour from xml?


I had a colour defined in a 'colours.xml' file in my project's 'values' folder like so:

<?xml version="1.0" encoding="utf-8"?>
<resources>
    <color name="tvBackground">#337700</color>
</resources>

Which, for those of you who cannot transpose directly from hex, looks like this:

My code looked like this:

   TextView tv = new TextView(getApplicationContext());
       
   tv.setBackgroundColor(R.color.tvBackground);

Seems reasonable doesn't it?

But when I ran my code, my shiny new little TextView came out with the background colour of this:


(that's #000000 in hex, or 'black' btw)

What was going on here?
Turns out, I wasn't using the correct method to set the background colour so that it comes out correctly, what I should have used was either of these:

   tv.setBackgroundResource(R.color.tvBackground);
- or -
   tv.setBackgroundColor(getResources().getColor(R.color.tvBackground));


.. Not especially well documented, but easily fixed.


Anyhow, now my TextView shows with the background colour of:


.. So all is now well with the world. Thought I'd just post this in case it helps someone out there (or myself when I forget next time)


until that next time, bye bye.


Monday, February 7, 2011

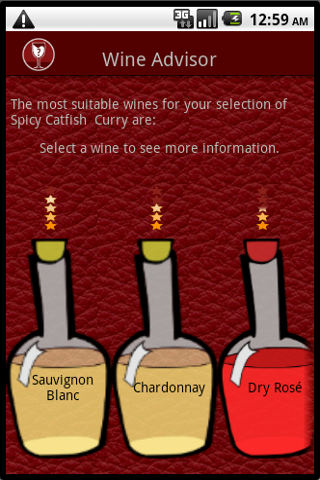
Wino the Wine Advisor now updated, new features & grrraphics


I've recently released an update for my Wino the Wine Advisor app,
The new version now allows you to combine tastes and also has some great new wine bottle graphics (even if I do say so myself).

Here are some screenshots:


.. And I have to say, those wine bottle images were an absolute pain to create.

I use Gimp and Inkscape to create all my graphics, in case you were wondering.


Sunday, January 23, 2011

How to get images dynamically


Lets say you're storing items in a slqite db for your new, soon-to-be-award-winning application, and one of the columns you're storing is the name of the image to associate with that item.

How on earth do you reference it from within your app so you can display it?
Good question! Here's how:


//first get a reference to the ImageView in our XML layout file we want to display the image in..

ImageView imgVw = (ImageView) customView.findViewById(R.id.imgVwInXML);

//Next check that there is actually an image file name in the db column:

if (OurDBCursor.getString(OurDBCursor.getColumnIndex("imageName")) != null) 
{
 
//if there is a name for the image, get that name..

  myImageName  = OurDBCursor.getString(OurDBCursor.getColumnIndex("imageName"));  
 

//get a reference to the image (located in our drawable folder in our project):
          
  int resID = getResources().getIdentifier("com.BlueMongo.Test:drawable/" + myImageName, null, null);  
 

//assign the resouce with that ID to our ImageView:
               
  imgVw.setImageResource(resID);
}

.. And that's it.

Hope that helps. Have a great day.

Sunday, November 21, 2010

Finding the users language settings via code


We've seen before how easy it is to reference difference resources based on the users language settings, but that was more-or-less managed by the Android framework itself.

What if you want to programmatically make decisions in your code based on what the user's language and local settings are?

Turns out, it's very easy, and here's how:
(this example assumes you have a TextView in your layout.main called tvLocale)

package com.Bluemongo.LanguageTest;

import java.util.Locale;

import android.app.Activity;
import android.os.Bundle;
import android.widget.TextView;

public class LanguageTest extends Activity 
{
 @Override
 public void onCreate(Bundle savedInstanceState) 
 {
  super.onCreate(savedInstanceState);
  setContentView(R.layout.main);
        
  TextView tvLocale = (TextView) findViewById(R.id.tvLocale);
        
       if (Locale.getDefault().getLanguage().equals("en")) 
        {tvLocale.setText("you're speaking English");}

        if (Locale.getDefault().getLanguage().equals("de")) 
        {tvLocale.setText("you're speaking German");}
        
        if (Locale.getDefault().getLanguage().equals("fr")) 
        { tvLocale.setText("you're speaking French");}   
        
  }
}


.. Told you it was easy.

Sunday, October 24, 2010

Wine Advisor, my first paid app is now available on the Android Market.

Wine Advisor, my first paid app is now available on the Android Market. And it's only $1.99! Bargain!


Discover what wines go with your favourite foods with Wine Advisor, the premier wine & food pairing assistant on Android.

Choose your food and find wine pairing suggestions, including a brief description of the wine. 

Great in restaurants or the grocery store. 

10,000 possible combinations!


Screenshots:


If you can, please support this blog and consider buying it, I'll be your best friend and answer all your Android questions first  :)

Thursday, October 14, 2010

Spinner down arrow stretching?

.. Styling the inner and outer views of a Spinner individually.


I was working with a Spinner with a lot of rows fetched from a database, and wanted to put a bit of padding around each item to make it easier for the user to select them.

So I went into my res\layout\spinner_view_row.xml (which controls how the Spinner rows display) and added this:

android:padding="5dip"

Then, when I went and re-ran my app, what used to look like this:


.. now looks like this:


.. Ooops. 


Looks like a condom doesn't it. Not what I was trying to achieve, really. If I made the padding large enough, it will also look like that before I've even selected anything.

Not what I wanted at all.

But I do want that padding around each item in my Spinner, otherwise my users will have too much trouble choosing items from my latest super-dooper, take-the-world-by-storm, #1 in the world market app, and it might not stay #1 for long at all.

Luckily, the answer is really, really simple.

You might recogise the below as the piece of code that binds a cursor from the database (containing all the items we want to display), to the xml view spinner_view_row, located at  res\layout\spinner_view_row.xml (this is the xml file in which we put the extra padding, above).


  final SimpleCursorAdapter ingredientAdapter =
  new SimpleCursorAdapter(this, android.R.layout.simple_spinner_item, ingredientsCursor, from, to); 
  ingredientAdapter.setDropDownViewResource(R.layout.spinner_view_row);

  spnIngredients.setAdapter(ingredientAdapter);

All we need to do to avoid the stretchy condom spinner arrow is to define another xml view in res\layout\ and call it something like spinner_view_closed, then paste into it the same code that you have in spinner_view_row.
Simply then customise this xml to have less padding, or a smaller text size for instance, then replace the reference to
simple_spinner_item
with a reference to this new xml file, like this:

  final SimpleCursorAdapter ingredientAdapter =
  new SimpleCursorAdapter(this, R.layout.spinner_view_row_closed, ingredientsCursor, from, to); 
  ingredientAdapter.setDropDownViewResource(R.layout.spinner_view_row);

  spnIngredients.setAdapter(ingredientAdapter);


.. and your new Spinner will look like this when open:


.. and this when closed.


Easy eh?
.. Told you so.

Monday, October 4, 2010

Android Market expands: More Countries, More sellers, More buyers

Support for paid Android application sales is now expanded to developers in 29 countries, with the addition of Argentina, Australia, Belgium, Brazil, Canada, Denmark, Finland, Hong Kong, Ireland, Israel, Mexico, New Zealand, Norway, Portugal, Russia, Singapore, South Korea, Sweden, Switzerland and Taiwan.

In addition, Android Market users from 32 countries will be able to buy apps, with the addition of Argentina, Belgium, Brazil, Czech Republic, Denmark, Finland, Hong Kong, India, Ireland, Israel, Mexico, Norway, Poland, Portugal, Russia, Singapore, Sweden, and Taiwan.

.. Get programming people!

Official blurb here.

Using EditText's inputType to control what type of keyboard is shown

As software developers, there are many circumstances in which you'll want to limit the input options available to your users. We've all seen situations along the lines of the person who enters 'two' in a field where we've only been expecting the number 2. Oh how that screws things up! Oh the laughs we've had eh?
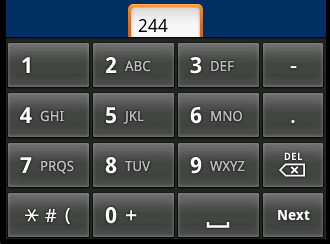
Fortunately, in Android it's easy to gently shepherd our precious users to input the sort of data we're expecting, and we do that with the editText's inputType attribute.

You can set your editText inputType as ‘Phone’ for example, and the user can able to type only numbers. If it is ‘Time’ it will allow only time related characters to be entered. Handy eh?

There are many options, and I've included (what I think is) all of them at the end of this post for your pleasure.

In the meantime, here are some examples that will hopefully illustrate this option:

        <EditText android:id="@+id/etWidth1"
            android:hint="@string/widthLabel"
            android:minWidth="75dip"
            android:inputType="textCapWords"
            android:lines="1"
            android:layout_height="wrap_content"
            android:layout_width="wrap_content">
        </EditText>

notice the capitalised first letter of the each sentence, that happens automatically!


        <EditText android:id="@+id/etWidth1"
            android:hint="@string/widthLabel"
            android:minWidth="75dip"
            android:inputType="textCapCharacters"
            android:lines="1"
            android:layout_height="wrap_content"
            android:layout_width="wrap_content">
        </EditText>


        <EditText android:id="@+id/etWidth1"
            android:hint="@string/widthLabel"
            android:minWidth="75dip"
            android:inputType="text"
            android:lines="1"
            android:layout_height="wrap_content"
            android:layout_width="wrap_content">
        </EditText>
ok, so nothing special to see here..


        <EditText android:id="@+id/etWidth1"
            android:hint="@string/widthLabel"
            android:minWidth="75dip"
            android:inputType="phone"
            android:lines="1"
            android:layout_height="wrap_content"
            android:layout_width="wrap_content">
        </EditText>


        <EditText android:id="@+id/etWidth1"
            android:hint="@string/widthLabel"
            android:minWidth="75dip"
            android:inputType="textUri"
            android:lines="1"
            android:layout_height="wrap_content"
            android:layout_width="wrap_content">
        </EditText>


Remember, limiting the allowable input characters is only one part of good design.

You still need to run a sanity check on all fields that allow the user to enter data.

This is absolutely essential in many, many situations. Do a google search for 'sql injection' for more information on how unsafe fields can result in your entire system being vulnerable.

Here is (what I think is) the full list of EditText InputTypes available to you :

text
textCapCharacters
textCapWords
textCapSentences
textAutoCorrect
textAutoComplete
textMultiLine
textImeMultiLine
textNoSuggestions
textUri
textEmailAddress
textEmailSubject
textShortMessage
textLongMessage
textPersonName
textPostalAddress
textPassword
textVisiblePassword
textWebEditText
textFilter
textPhonetic
number
numberSigned
numberDecimal
phone
datetime
date
time

Sunday, August 1, 2010

Using spinner.setSelection & finding the spinner doesn't show the selected item when closed?


Ok, I've just spent a couple of hours trying to figure this out, and now I have, I thought I'd share the incredibly simple solution with you.

The issue: I was needing to set a Spinner's selected item via code, but found when calling the Spinner's setSelection method and passing in the position to set it to, something odd would happen, the closed spinner would appear blank, yet, when clicking on it, the item I've asked to be selected would be correctly located at the top of the spinner.

It looks like a Spinner is not told to redraw when using .setSelection(position), what you have to do is call .setSelection(int position, boolean animate) unless you want your selection to happen silently behind the scenes.

Odd, but easily sorted out.

The incredibly simple solution:

This won't show the fact that the Spinner selection has been set:


spnIngredients.setAdapter(ingredientAdapter);
spnIngredients.setSelection(position);

This will:


spnIngredients.setAdapter(ingredientAdapter);
spnIngredients.setSelection(pos, true);


Hope that helps someone out there.
.. Happy Spinning.

Monday, July 12, 2010

Google App Inventor: Android for Beginners for absolute beginners!

Today Google announced a simple-to-use DIY app maker called Google App Inventor.

Google App Inventor brings Android development to non-programmers, employing a design scheme that relies on visual blocks rather than writing pages of code, the App Inventor -- In true Google style, still in Beta, of course -- has functions for just about anything you can do with an Android handset, including access to GPS and phone functionality.

I can imagine this would be fantastic in classrooms.

more information here: http://appinventor.googlelabs.com/about/
complete this form to apply for access: https://services.google.com/fb/forms/appinventorinterest/


Tre Cool!

Tuesday, June 29, 2010

How to tile a background image in Android


For one of the apps I'm working on I wanted to have a nice pixel pattern tiled behind my widgets.
After a little bit of hunting around I found this tutorial, and I thought I'd clean up the lessons within and show you how.

Here's the contents of my main.xml layout file,

<?xml version="1.0" encoding="utf-8"?>
<LinearLayout xmlns:android="http://schemas.android.com/apk/res/android"
    android:orientation="vertical"
    android:layout_width="fill_parent"
    android:layout_height="fill_parent"
    android:background="@drawable/backrepeat"
    android:gravity="center_horizontal"
    >
<TextView  
    android:layout_width="fill_parent" 
    android:layout_height="wrap_content" 
    android:text="@string/hello"
    />  
</LinearLayout>


which is referenced in code in the standard way like this:

@Override
public void onCreate(Bundle savedInstanceState) {
super.onCreate(savedInstanceState);
setContentView(R.layout.main);
...// (rest of onCreate method continues here..)

Now note this line:

android:background="@drawable/backrepeat"


What's going on there?
.. Glad you asked!

Here's a quick screenshot of the contents of one of my drawable folders in my project:


What is this
backrepeat.xml?

Well, here's the contents of that file here:

<bitmap
xmlns:android="http://schemas.android.com/apk/res/android"
android:src="@drawable/scale1"
android:tileMode="repeat"
android:dither="true" />


Can you see what's going on?
Backrepeat.xml defines an instance of the BitmapDrawable class, and that class references our simple scale1.jpg, located in the drawable-hdpi folder.

Simply by adding the:

<bitmap
    xmlns:android="http://schemas.android.com/apk/res/android"
    android:src="@drawable/scale1"
    android:tileMode="repeat"
    android:dither="true" />

line in bold, we are able to achieve results such as this:


Easy isn't it?

One thing to keep in mind is that you should have folders drawable-hdpi, drawable-mdpi & drawable-ldpi, you'll need to add this backrepeat.xml file and the relevant images to each of these to allow this functionality in high, medium and low dpi (dots per inch) screen sizes.

Enjoy.

Saturday, June 19, 2010

Localisation & Internationalisation on Android, the easy way


You often hear about Internationalisation (internationalization in US English, or i18n for short), and Localisation (Localization in US English, or L10n for short) in software development circles... ever wonder what that's all about?

Of course you do.

Definitions vary, but the basic idea is generally easily summarised:
  • Internationalisation is the process of designing a software application so that it can be adapted to various languages and regions without engineering changes.
  • Localisation is the process of adapting internationalized software for a specific region or language by adding locale-specific components and translating text.

These two terms usually go hand-in-hand as the term 'globalisation'. See?
.. Course you do.


Each language is given a language code such as 'en-au' for Australian English, or 'en-us' for American English. These language codes are two-letter lowercase ISO language codes (such as "en") as defined by ISO 639-1.
But how do we use this? And how can we easily apply these concepts to our Android programming?

.. Good question!

Best practices in Android suggests defining all your string resources in a 'strings.xml' file (you're doing this already, right?) and placing that file in the 'res\values' folder in your project.

Localisation in Android is as simple as creating a new version of this file and folder, renaming the 'values' folder to 'values' + the language code you wish to support.

For example, all your Italian translations would be located in 'res\values-it\strings.xml', your Chinese translations in 'res\values-zh\strings.xml' as seen here:


If you don't happen to have a friend from whatever country you're trying to translate your app for, just use Google translate.

Once you're done your app is one simple step away from global domination.

All you need to do is copy those freshly translate strings back into a strings.xml file in Eclipse, and, as long as the folder the strings.xml file is located in has the name of 'values' + the language code you're wishing to support, magically any user who has their phone locale set to a locale that uses that language, your translated strings will be used.

No code changes are required.

Handy eh?